Difference between revisions of "Dop Impronta/it"
(Created page with "==Procedura di Scansione==") |
N.donneschi (talk | contribs) (Created page with "La prima scansione richiesta dal software é il registro occlusale. Posizionare l'oggetto, sia che si tratti di un triple tray o di un bite vestibolare, in una posizione tale...") |
||
| Line 28: | Line 28: | ||
==Procedura di Scansione== | ==Procedura di Scansione== | ||
| − | + | La prima scansione richiesta dal software é il registro occlusale. Posizionare l'oggetto, sia che si tratti di un triple tray o di un bite vestibolare, in una posizione tale da ottenere tutti i dettagli sia della mascella che della mandibola. | |
In our example case, a vestibular bite has been used. | In our example case, a vestibular bite has been used. | ||
Revision as of 15:53, 4 January 2017
È possibile scansionare un caso di protesi usando due impronte in antagonismo con l'ausilio di un riferimento occlusale, per esempio un bite vestibolare o un'impronta di tipo triple tray.
Iniziando da OpticalRevEng Dental
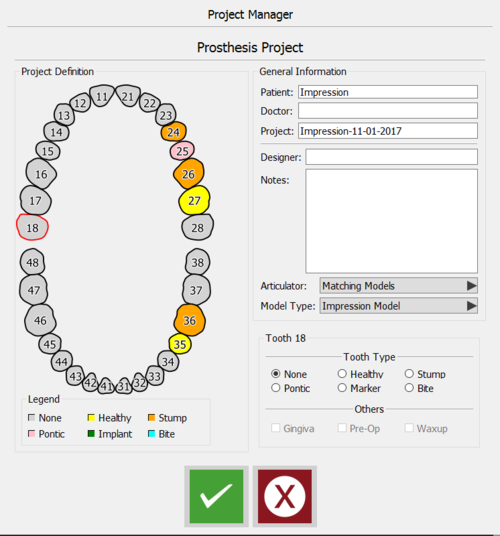
Per scansionare un progetto di protesi usando due impronte in antagonismo iniziando dal software di scansione, accedere al Gestore Progetto e selezionare gli elementi come da immagine:
Per il corretto funzionamento del progetto è necessario ricordarsi di selezionare nel menù Tipo di Modello la voce Impronta. Per continuare, cliccare sul bottone verde.
Iniziando da Exocad
È possibile attivare il wizard per questo tipo di progetto anche creando il progetto in Exocad, semplicemente creando il progetto dal Dental DB di Exocad.
Per accede alla procedura guidata di scansione, salvare il progetto e cliccare sull'icona di scansione.
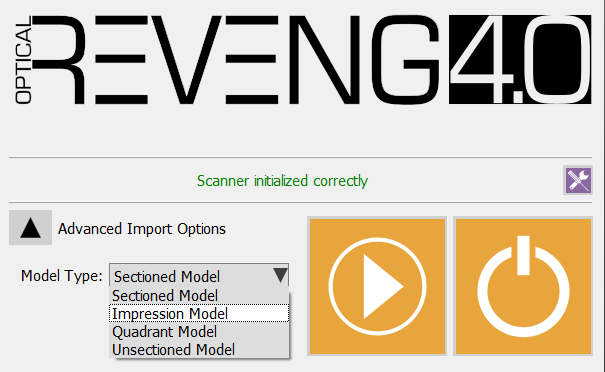
A questo punto, nel pannello iniziale, è necessario aprire il pannello di Opzioni d'Importazione avanzate e, nel menù Tipo di Modello selezionare Impronta.
Confermare la scelta di modello cliccando sul bottone Inizia. Il software adatterà il wizard di scansione affinché proponga all'utente l'acquisizione di due impronte e del loro registro occlusale.
Procedura di Scansione
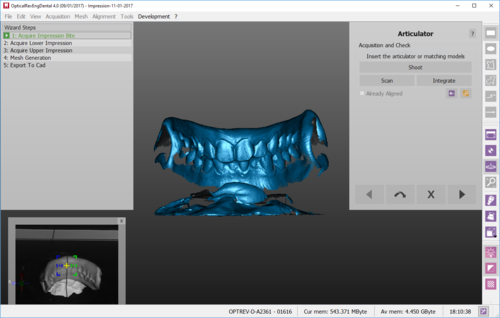
La prima scansione richiesta dal software é il registro occlusale. Posizionare l'oggetto, sia che si tratti di un triple tray o di un bite vestibolare, in una posizione tale da ottenere tutti i dettagli sia della mascella che della mandibola.
In our example case, a vestibular bite has been used.
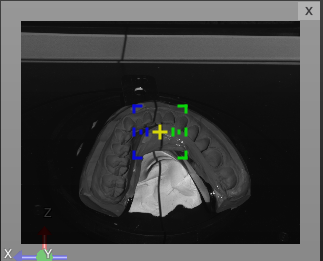
The software will then ask the user to scan the Lower Impression. Place the impression in the scanner, as described in the following picture, then click scan to start the acquisition.
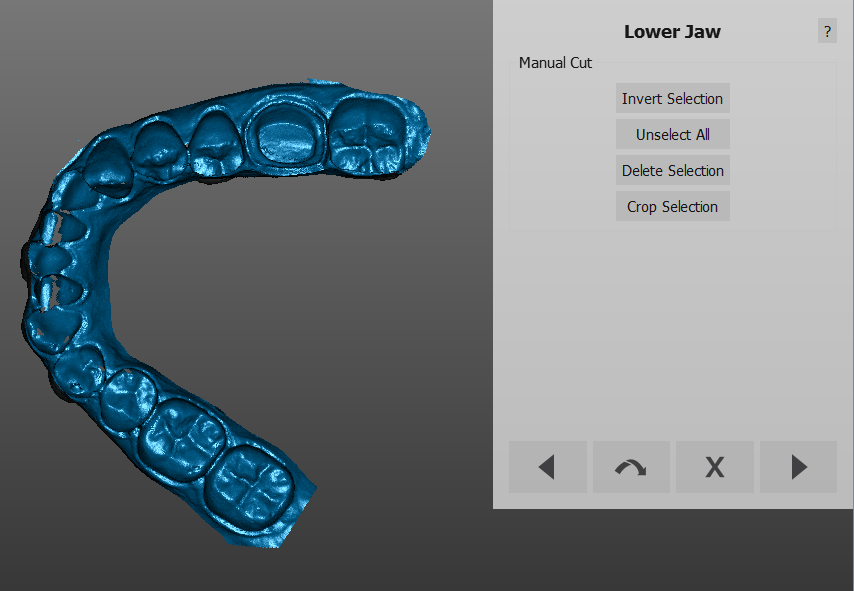
Once the impression has been scanned, click next and cut the model base, taking care not to cut part of the teeth as well. The selected part will be, as always, automatically removed.
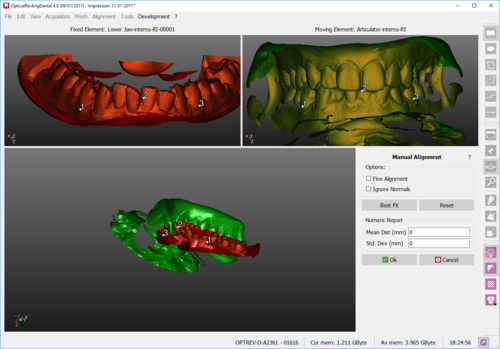
Right after the Cut Height step, the impression will be aligned with the occlusion. It is possible that the automatic alignment fails, being the objects two impression. A Manual Alignment step will be automatically presented by the software. Carefully choose the common area between the impression and the occlusal key.
Then click Best Fit, accept with OK if the alignment is good or remake the alignment clicking on Reset.
Once it has been aligned, clean the image as much as possible.
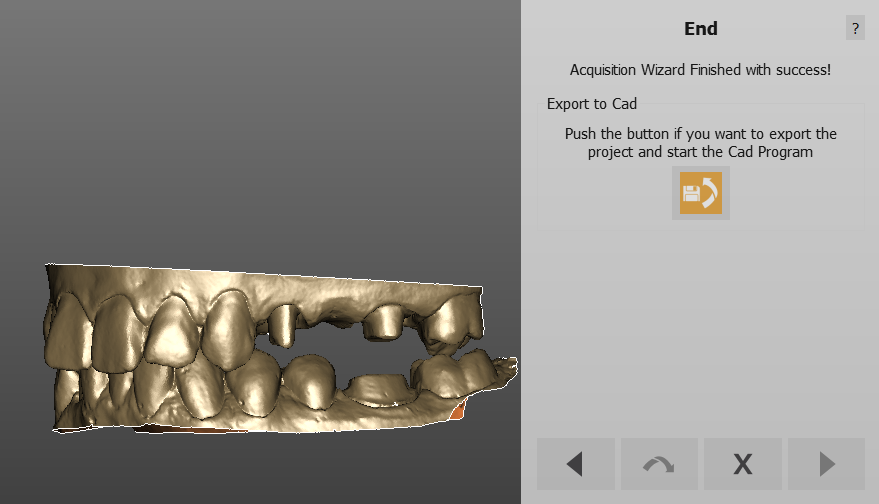
Repeat this process for the upper jaw and follow the steps until the final acquisition check. If the occlusion is correct, click next to generate the meshes.
