Difference between revisions of "Free Mode/zh-hant"
Democenter (talk | contribs) (Created page with "在自由模式下,軟件沒有關於進行掃描物件的類型,其名稱或顏色的任何信息。<br /> 通過點擊採集按鈕,一個額外的對話框會要求添...") |
Democenter (talk | contribs) (Created page with "=對齊=") |
||
| Line 17: | Line 17: | ||
{{Small image|Dental_2_5_freeModeAcquisition.jpg}} | {{Small image|Dental_2_5_freeModeAcquisition.jpg}} | ||
| − | = | + | =對齊= |
In Free Mode, the software can't automatically identify the reference item. To align two objects, use the drag and drop function as explained in the [[Project_Tree#Free_Project|Project Tree]] page. | In Free Mode, the software can't automatically identify the reference item. To align two objects, use the drag and drop function as explained in the [[Project_Tree#Free_Project|Project Tree]] page. | ||
Revision as of 14:04, 15 June 2016
自由模式
自由專案模式是 OpticalRevEng Dental的特別用法,建議當用戶需要獲得一些不適合在任何結構性專案支持的數據.
自由模式可用於測試掃描系統或掃描單一物件.
在自由模式中沒有專案樹狀圖,沒有自動對齊,也沒有引導精靈.然而,它仍然可以採集數據,對齊兩個對象在一起,生成網格和編輯所有的信息
該專案的邏輯完全操縱在用戶的手中,使用者負責做出正確選擇的參考項,對齊所有物件,並為所有專案數據選擇最佳的掃描和網格策略.
有些工具在自由模式的工作方式不同,隨著專案可能缺少一些信息
採集
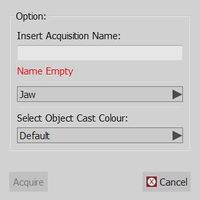
在自由模式下,軟件沒有關於進行掃描物件的類型,其名稱或顏色的任何信息。
通過點擊採集按鈕,一個額外的對話框會要求添加此信息
對齊
In Free Mode, the software can't automatically identify the reference item. To align two objects, use the drag and drop function as explained in the Project Tree page.
Mesh Generation
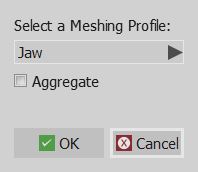
As no information was provided about the scanned object, an extra dialog will require the user to define the appropriate Mesh Generation strategy.
In the same dialog, it is also possible to choose whether to aggregate the acquisition or not.
If aggregate is checked, the software will create just one mesh with all the selected acquisitions.
If aggregate is not checked, each acquisition will be separately converted.
Implant Alignment
When an implant marker is aligned to its implant library, the tooth position of the Scan Body needs to be manually defined.
Select the correct implant position or the identification will not be correctly exported
Exocad Export
In a free project, the software can't automatically export the data to Exocad.
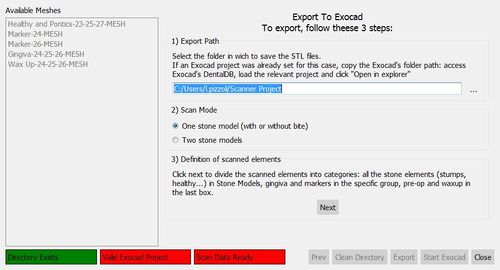
By clicking on the Export To CAD button, a wizard will start. The first page will ask:
- In which folder the data has to be exported
- If the user wants to export a single model (with or without a bite) or two stone models
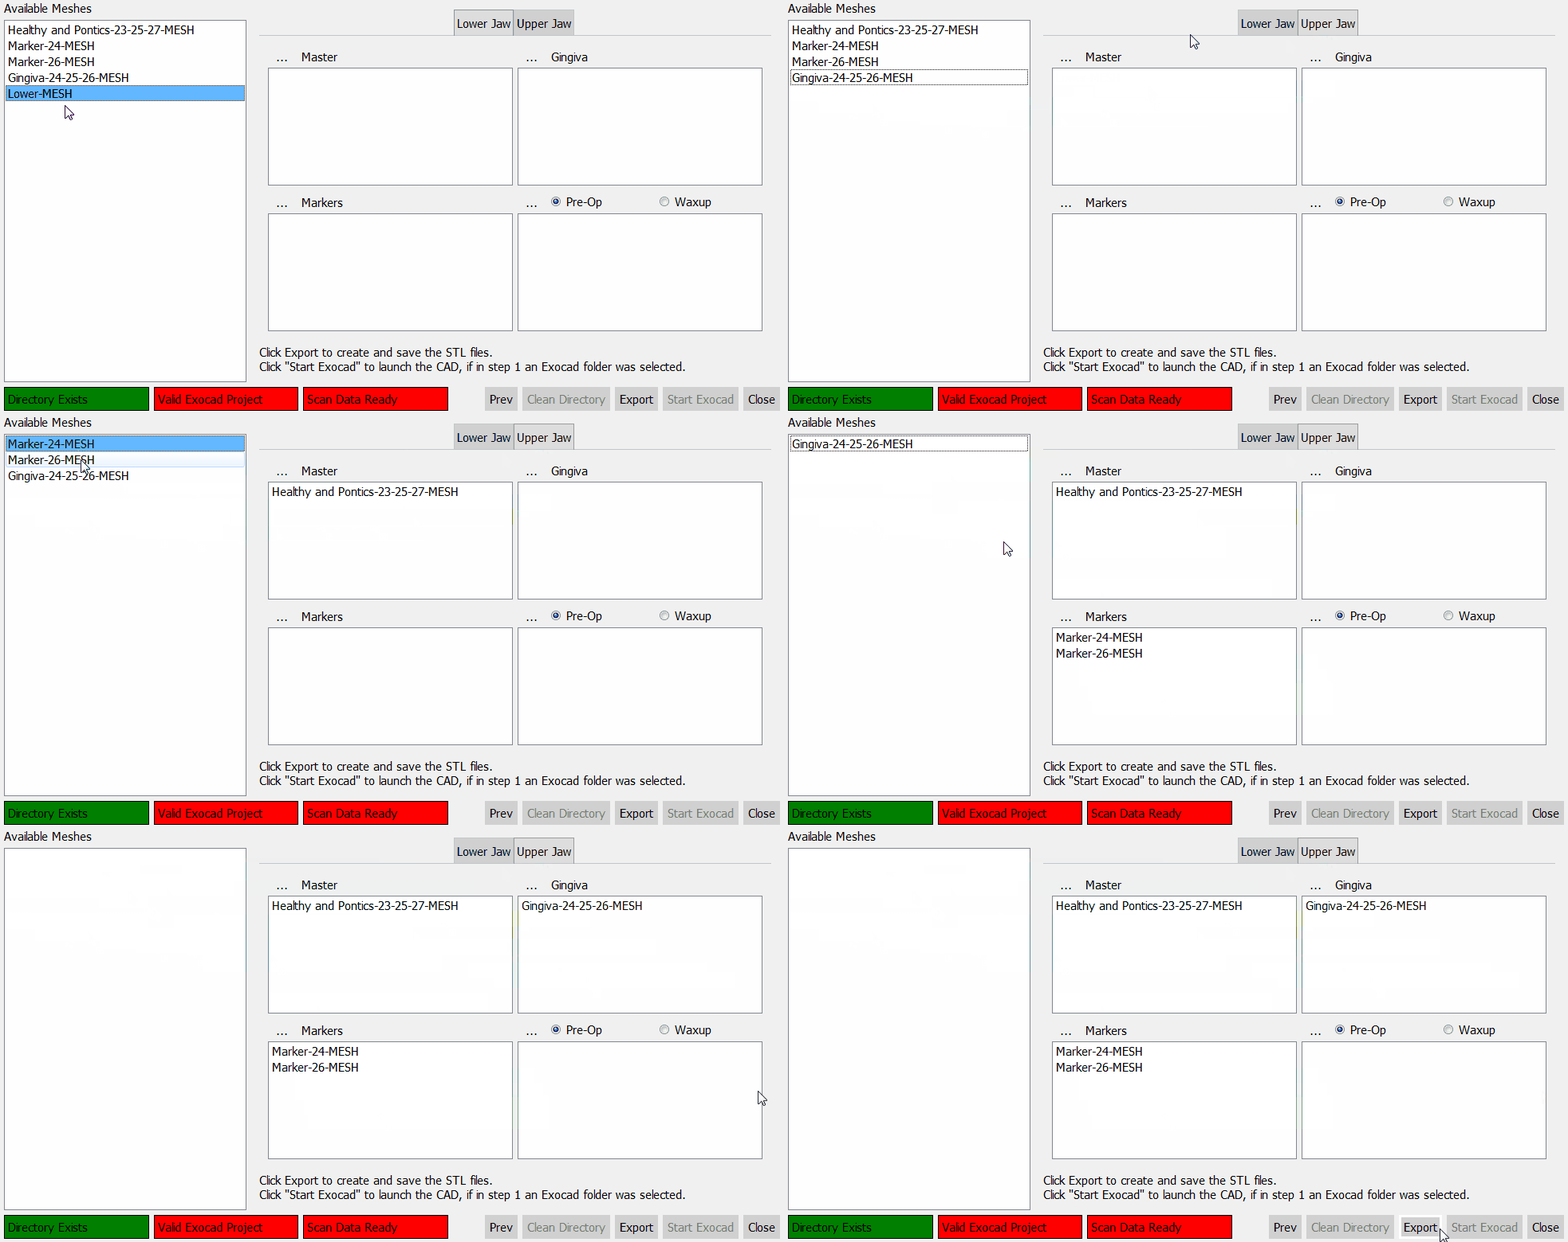
Then, after clicking next, the software will ask the user to specify the status of each mesh in the project.
For every jaw, the following meshes can be identified:
- Master Meshes : all the meshes that are part of the stone model: healthy parts, stumps, pontic parts, etc.
- Gingiva Meshes : mesh of the separated gingiva
- Markers : meshes of the implant markers
- Pre-Op or Waxup : mesh of the Provisional Model or of a Waxup, selecting the type of element.
When all the meshes are identified, click Export to save the files on disk.


