Difference between revisions of "Wiz Acquisition/ru"
Trubnikova (talk | contribs) (Created page with "# Прочитать описание объекта # Поместить нужный объект внутрь сканера # Нажать ''Скан'' # Если скан...") |
Trubnikova (talk | contribs) |
||
| Line 12: | Line 12: | ||
* Краткое описание объекта | * Краткое описание объекта | ||
* Меню выбора ''Цвета объекта'' | * Меню выбора ''Цвета объекта'' | ||
| − | * Кнопка''Скан'' для запуска сканирования | + | * Кнопка ''Скан'' для запуска сканирования |
| − | * Кнопка'' | + | * Кнопка''Добавить'' для объединения с предыдущим сканированным объектом |
* ''Соотнесено'' проверяет, действительно ли объект уже был соотнесен к остальным данным проекта. | * ''Соотнесено'' проверяет, действительно ли объект уже был соотнесен к остальным данным проекта. | ||
Revision as of 16:12, 5 March 2016
Contents
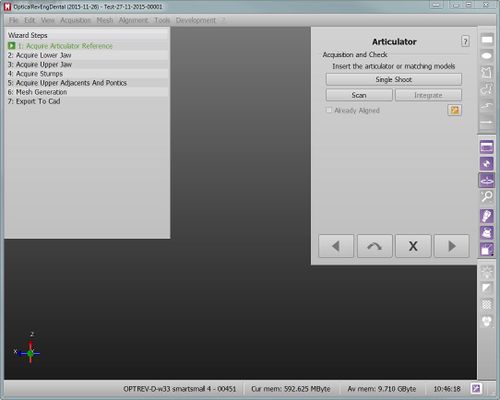
Сканирование в Мастере
Во время работы с Мастером настройки возможно: сканировать отдельные объекты и их совокупность в одно сканированное изображение, заново сканировать уже созданное изображение или объединить изображения.
Отдельный объект
При каждом сканировании, на экране в этом режиме будет отображаться:
- Название объекта для сканирования
- Краткое описание объекта
- Меню выбора Цвета объекта
- Кнопка Скан для запуска сканирования
- КнопкаДобавить для объединения с предыдущим сканированным объектом
- Соотнесено проверяет, действительно ли объект уже был соотнесен к остальным данным проекта.
Следовать инструкциям довольно просто:
- Прочитать описание объекта
- Поместить нужный объект внутрь сканера
- Нажать Скан
- Если сканирование не удалось, нажмите снова кнопку Скан для запуска нового сканирования, или кнопку Добавить для добавления данных
Advanced Parameters
During the wizard the acquisition strategy is selcted automatically depending on the kind of element to acquire.
There are some specific cases, however, in which it might be necessary to change the scanning strategy to a non default one. For instance, if the user needs to scan abutments instead of stumps, it would be best to select the specific abutment strategy. Same goes if the user needs to design a veneer: it is not a default strategy for stumps but it can be selected during acquisition.
To change strategy, click on the ![]() button and select it from the drop down menu.
button and select it from the drop down menu.
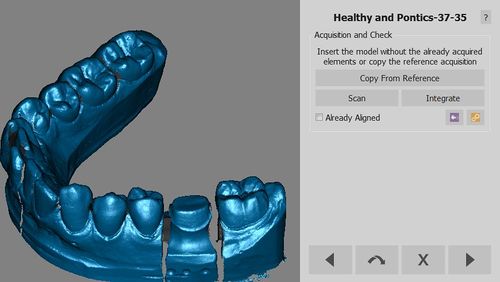
Copy From Reference
Sometimes, one element data has already been scanned during another acquisition.
In these cases, the software will show an additional button (Copy From Reference) that, instead of starting a new acquisition, will simply make a copy of the previous one.
After the Base Cut step, the software will automatically remove the duplicates from the acquisition.
Multi Acquisition
When acquiring multiple dies or multiple implants, it's better not to carry out a single acquisition for every element.
It is possible to acquire many objects at once.
Just make sure that the objects are completely visible in all their parts and that they are at an adequate distance either on the model holder or on the Multi-Die support.
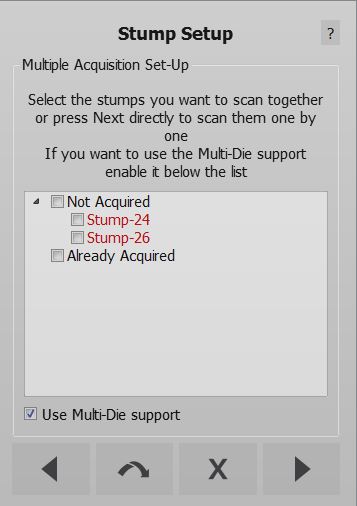
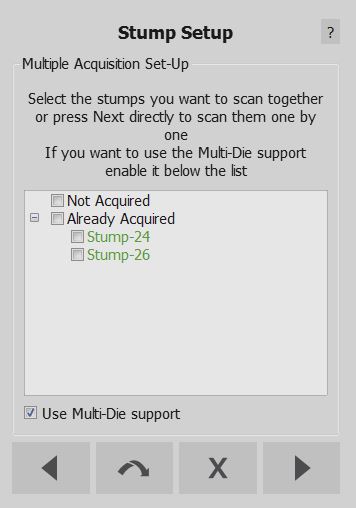
In these cases, the software will show a Multi-Acquisition Setup step where it is possible to select the objects to be scanned at the same time.
This step will show a list of all the objects that have to be scanned together with the already acquired items. Flag the boxes of the objects that have to be scanned together and, when scanning stumps, flag the Use Multi-Die support option on the bottom of the dialog to use the Multi-Die holder.
With Multi-Die
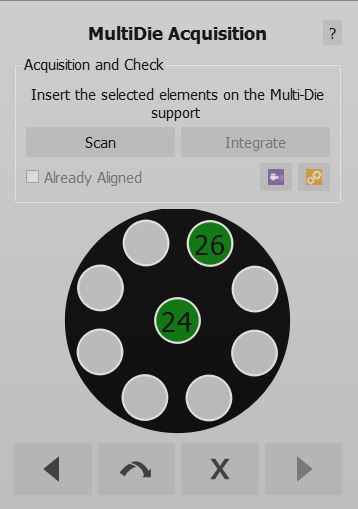
If the Multi-Die option is selected, the software will set up a specific acquisition for the dies; an image will guide the user in positioning the dies in the Multi-Die holder.
After the acquisition, the software will automatically recognize each single die and return to the Multi-Acquisition Step to allow the acquisition of additional objects.
Without Multi-Die
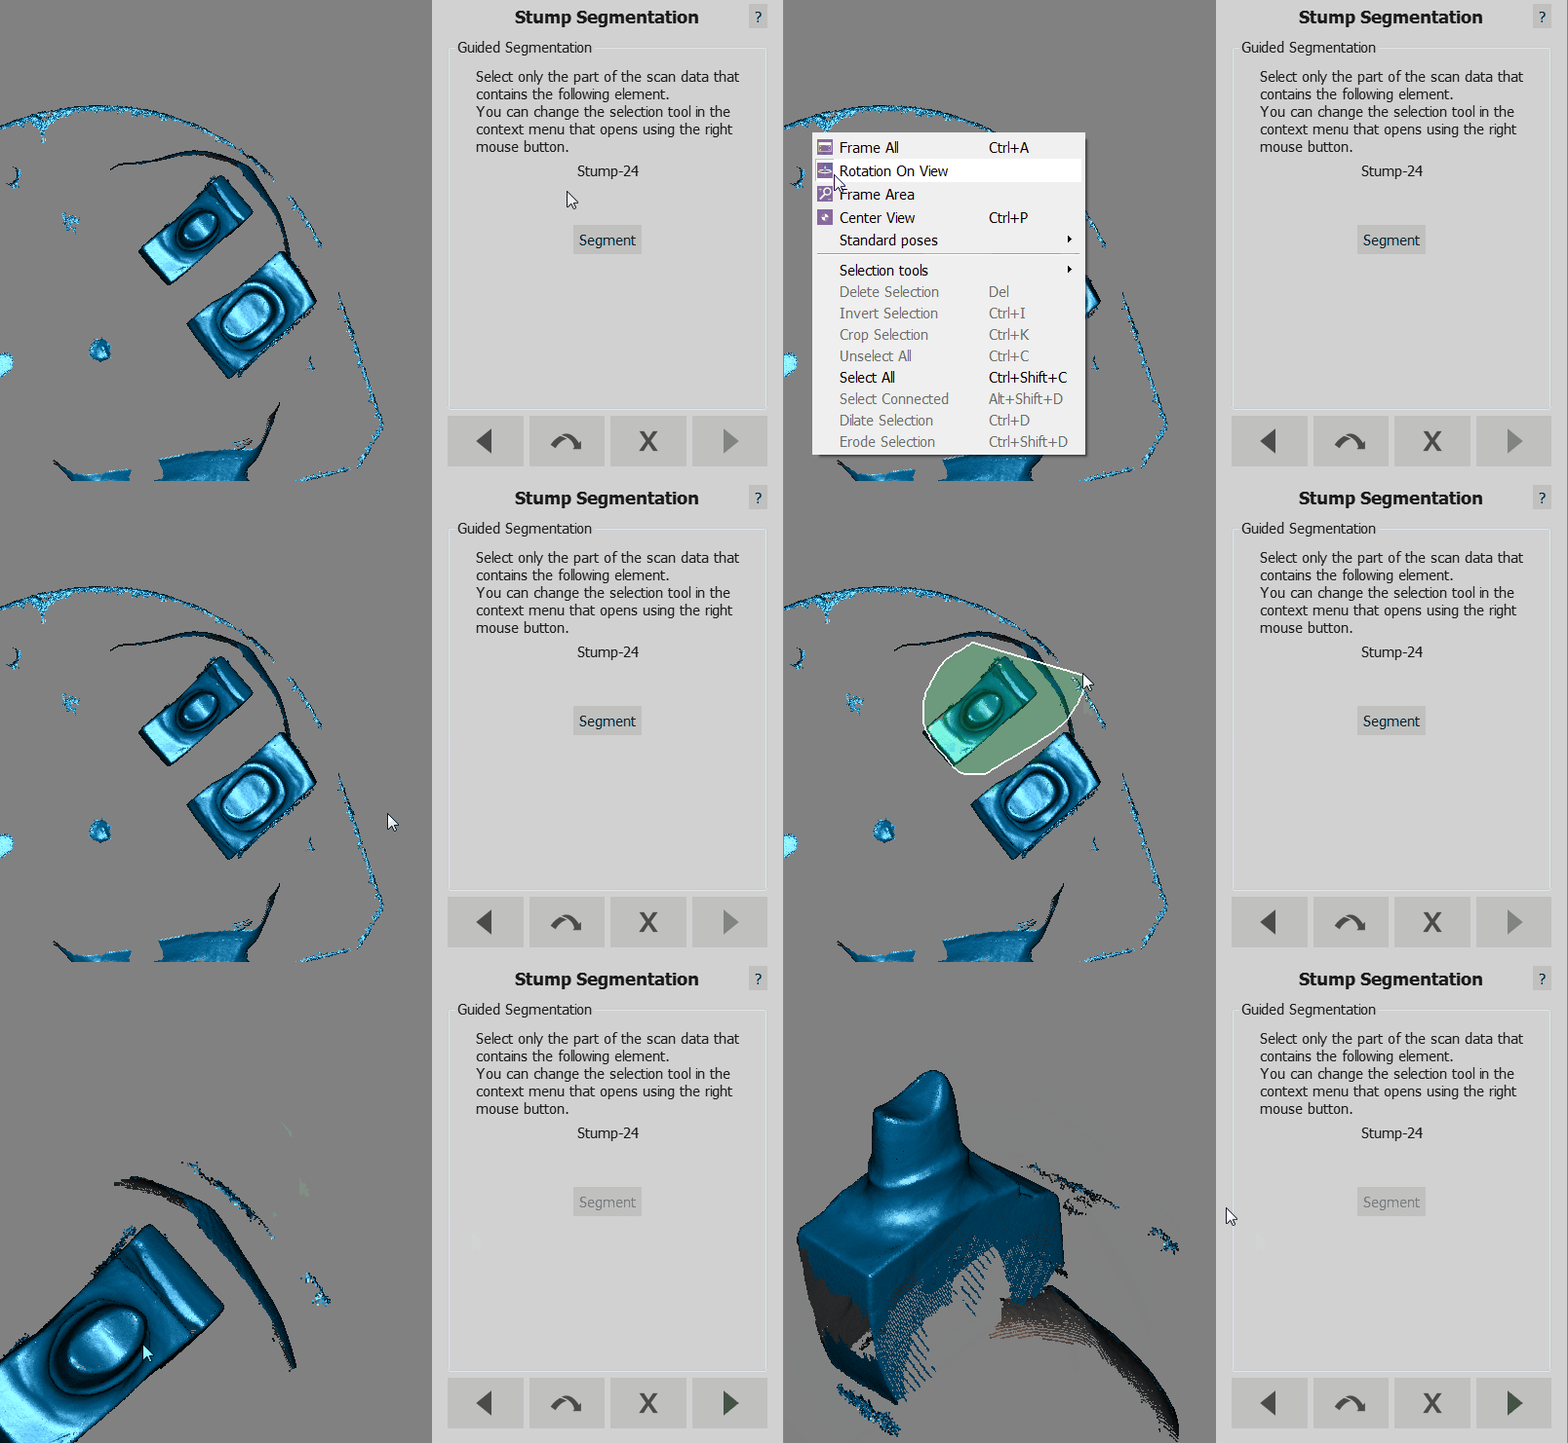
If the Multi-Die is not selected, the software will acquire the objects and, in the following step, require the user to manually identify each object.
A specific Wizard Step will ask which object has to be identified. The user has to:
- Read from the Wizard Page which object has to be selected
- Select the specific object, using a Selection Tool
- Click the button Segment
- Click the button Next
When the objects are all identified, the software returns to the Multi-Acquisition step. If all the objects have already been aquired, click Next to continue with the Step-By-Step Wizard
Integration
By clicking the Integrate button after an acquisition, the Integration mode will be launched.
