Difference between revisions of "Wiz Acquisition/ja"
(Created page with "* 取得されるオブジェクト名 * スキャンされる内容の簡単な説明 * ''オブジェクトの色''のセレクター * 取得を開始する''Scan''(ス...") |
(Created page with "ウィザードを使うのは非常に簡単です:") |
||
| Line 16: | Line 16: | ||
* このオブジェクトがプロジェクトの残りの部分にアライメントされているかどうかを示す、''Already Aligned''(アライメント済み)チェック | * このオブジェクトがプロジェクトの残りの部分にアライメントされているかどうかを示す、''Already Aligned''(アライメント済み)チェック | ||
| − | + | ウィザードを使うのは非常に簡単です: | |
# Read the object description | # Read the object description | ||
Revision as of 12:42, 29 December 2015
Contents
ウィザードでの取得
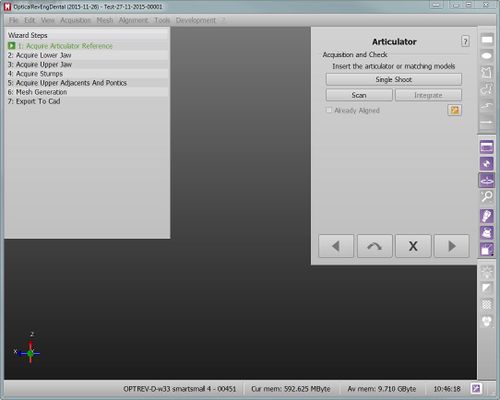
ステップバイステップウィザードでは、単一オブジェクトを取得したり、複数のオブジェクトを1回のスキャンで取得したり、以前取得したオブジェクトを再取得したり、これらすべての取得を統合することができます。
シングルオブジェクト
部品が取得されるたびに、特定のウィザード画面で以下が表示されます:
- 取得されるオブジェクト名
- スキャンされる内容の簡単な説明
- オブジェクトの色のセレクター
- 取得を開始するScan(スキャン)ボタン
- 以前取得されたオブジェクトの統合を開始するIntegrate(統合)ボタン
- このオブジェクトがプロジェクトの残りの部分にアライメントされているかどうかを示す、Already Aligned(アライメント済み)チェック
ウィザードを使うのは非常に簡単です:
- Read the object description
- Put the right object inside the scanner
- Click Scan
- If the acquisition is not satisfactory, click again the Scan button to start a new acquisition, or the Integrate button to add data
Advanced Parameters
During the wizard the acquisition strategy is selcted automatically depending on the kind of element to acquire.
Sometimes it can be useful to use a different strategy for one element.
In that case, click on the ![]() button to select a different strategy.
button to select a different strategy.
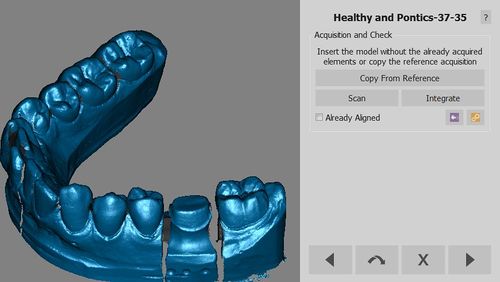
Copy From Reference
Sometimes, one element data has already been scanned during another acquisition.
In these cases, the software will show an additional button (Copy From Reference) that, instead of starting a new acquisition, will simply make a copy of the previous one.
After the Base Cut step, the software will automatically remove the duplicates from the acquisition.
Multi Acquisition
When acquiring multiple dies or multiple implants, it's better not to carry out a single acquisition for every element.
It is possible to acquire many objects at once.
Just make sure that the objects are completely visible in all their parts and that they are at an adequate distance either on the model holder or on the Multi-Die support.
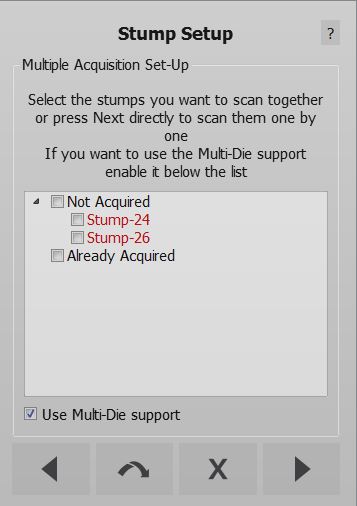
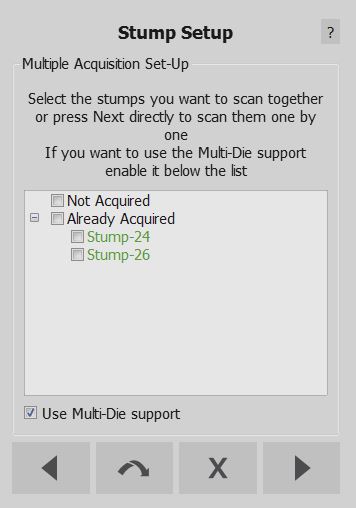
In these cases, the software will show a Multi-Acquisition Setup step where it is possible to select the objects to be scanned at the same time.
This step will show a list of all the objects that have to be scanned together with the already acquired items. Flag the boxes of the objects that have to be scanned together and, when scanning stumps, flag the Use Multi-Die support option on the bottom of the dialog to use the Multi-Die holder.
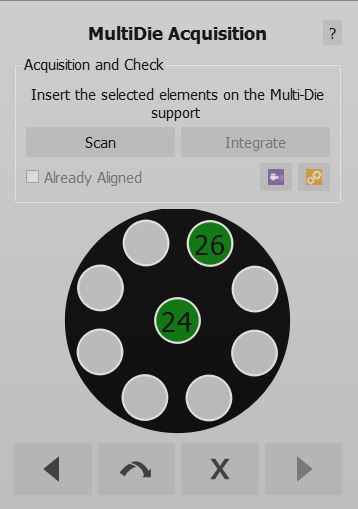
With Multi-Die
If the Multi-Die option is selected, the software will set up a specific acquisition for the dies; an image will guide the user in positioning the dies in the Multi-Die holder.
After the acquisition, the software will automatically recognize each single die and return to the Multi-Acquisition Step to allow the acquisition of additional objects.
Without Multi-Die
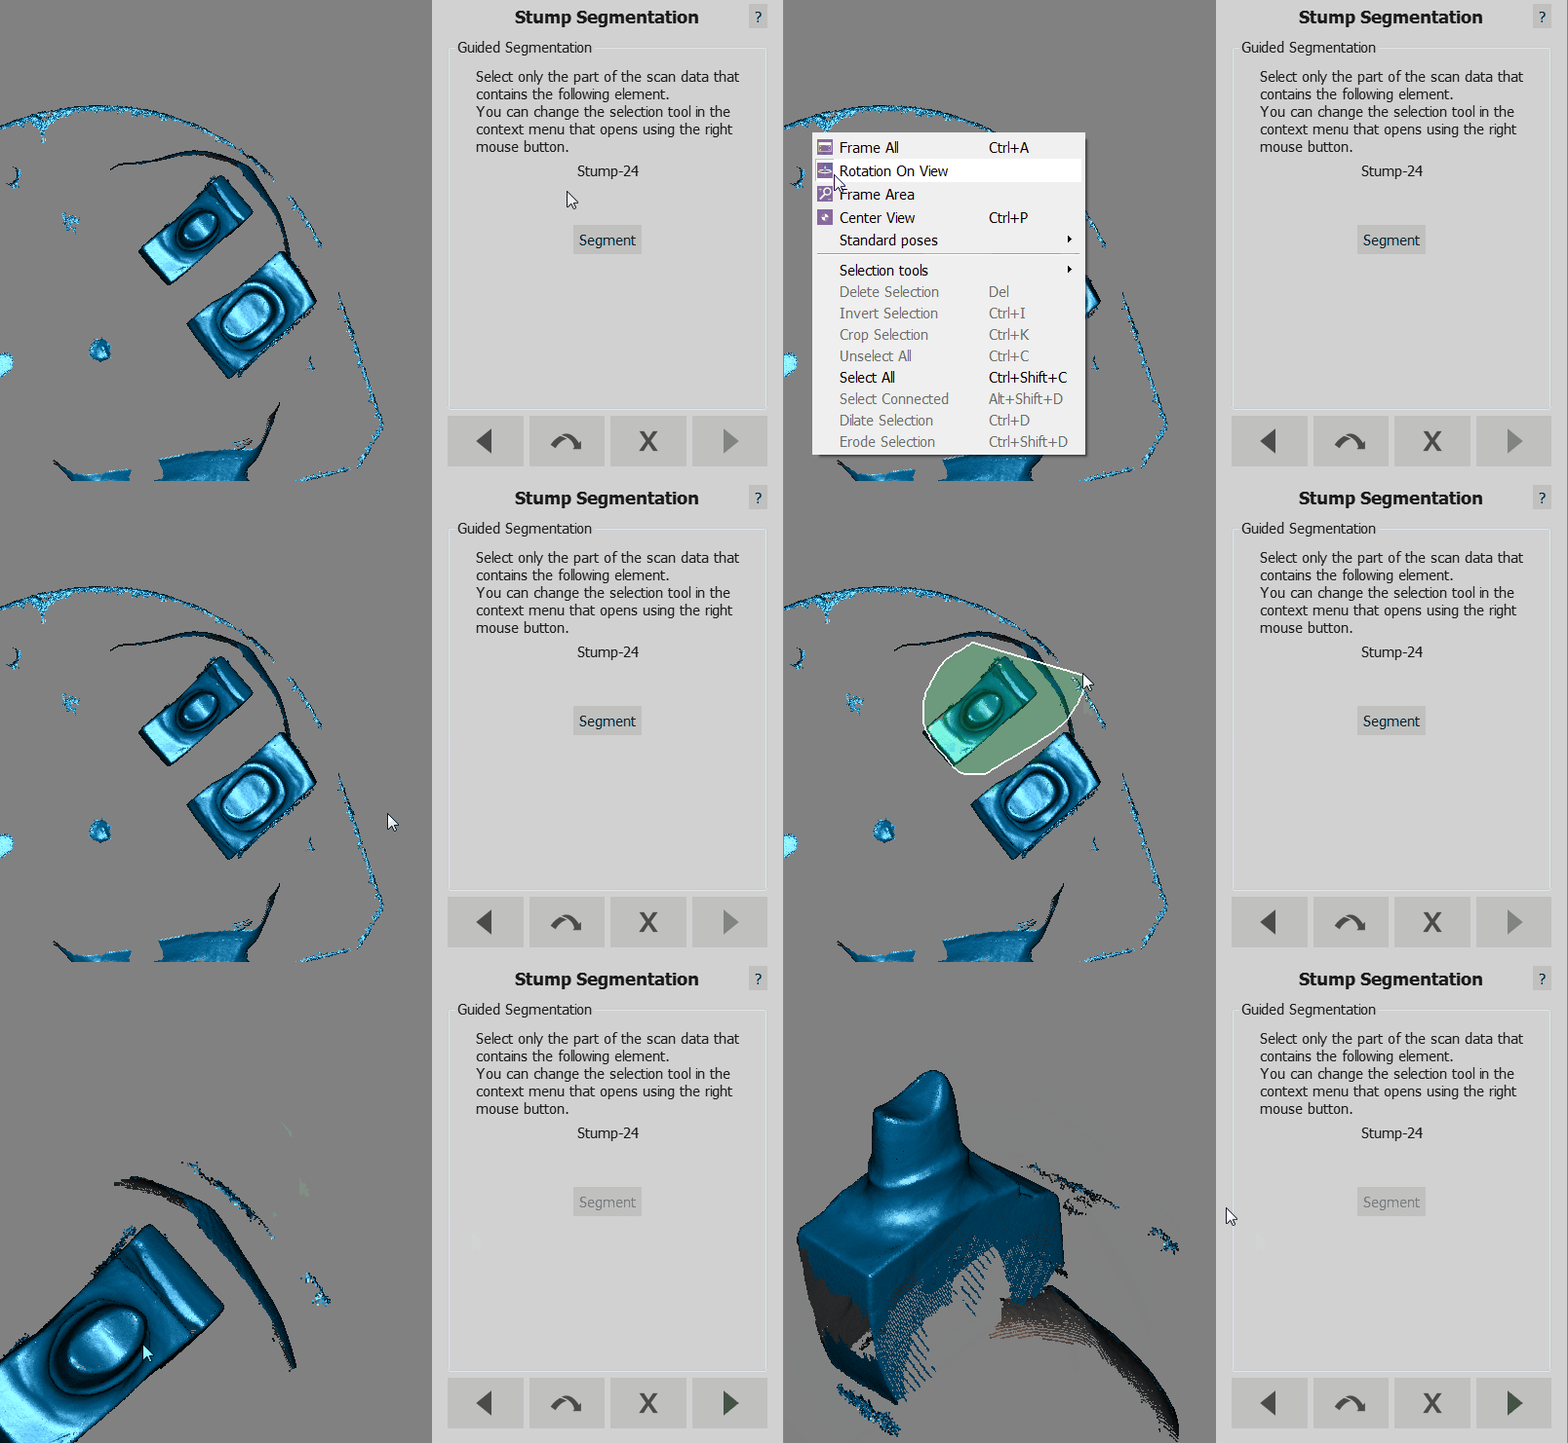
If the Multi-Die is not selected, the software will acquire the objects and, in the following step, require the user to manually identify each object.
A specific Wizard Step will ask which object has to be identified. The user has to:
- Read from the Wizard Page which object has to be selected
- Select the specific object, using a Selection Tool
- Click the button Segment
- Click the button Next
When the objects are all identified, the software returns to the Multi-Acquisition step. If all the objects have already been aquired, click Next to continue with the Step-By-Step Wizard
Integration
By clicking the Integrate button after an acquisition, the Integration mode will be launched.
