Difference between revisions of "Wiz ConceptQuad/zh-hant"
Democenter (talk | contribs) (Created page with "在開始螢幕中選擇高級導入選項,然後在'''模型類型'''下拉菜單選''單側模型''.") |
(Importing a new version from external source) |
||
| (11 intermediate revisions by 2 users not shown) | |||
| Line 2: | Line 2: | ||
{{DISPLAYTITLE:Concept Quad Module|noerror}} | {{DISPLAYTITLE:Concept Quad Module|noerror}} | ||
| − | = | + | =单侧咬模模块= |
| − | + | 当在许可证中启用此模块时,可以在两个步骤内扫描单侧咬模项目。工作过程非常简单,完全自动化,全程有指导。 | |
| − | == | + | ==从OpticalRevEng Dental开始== |
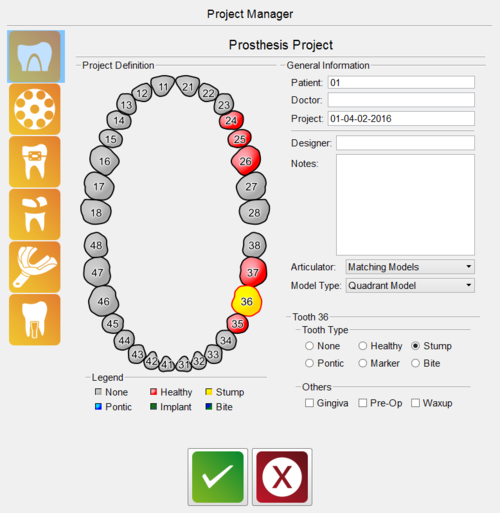
| − | + | 要从扫描软件直接使用单侧咬模模块扫描项目,请访问项目管理器并创建这种类型的项目: | |
| − | + | {{Screenshot|ProjectManagerQ.PNG}} | |
| − | + | 只需牢记,在'''模型类型'''的下拉选单选择“单侧咬模”并按下绿色的按钮接受。 | |
| − | == | + | ==从Exocad开始== |
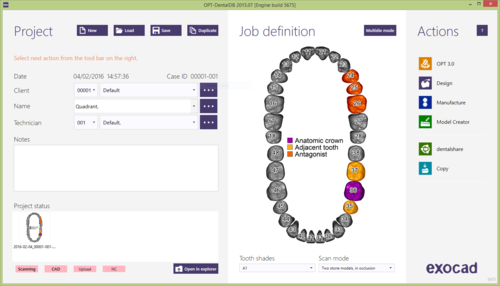
| − | + | 可以从Exocad开始使用这种类型的扫描向导。只需要在Exocad的Dental DB中照常定义项目。 | |
| − | + | {{Screenshot|ProjExo.PNG}} | |
| − | + | 保存该项目,然后点击扫描按钮。这将启动扫描软件的引导程序。 | |
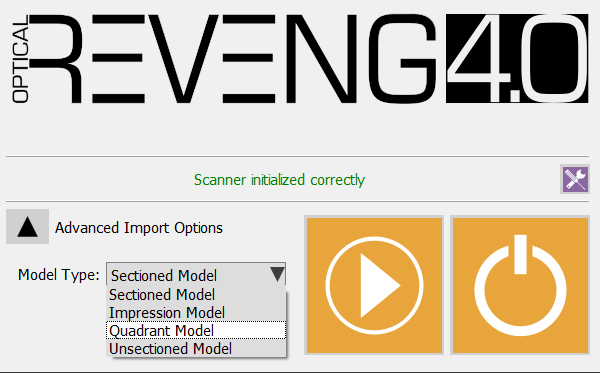
| − | + | 在开始屏幕中选择“高级导入选项”,然后在'''模型类型'''下拉菜单选''单侧模型''。 | |
[[File:SplashExoQ.PNG]] | [[File:SplashExoQ.PNG]] | ||
| − | + | 点击开始按钮确认选择,软件将执行单侧咬模模块扫描向导。 | |
| − | == | + | ==扫描程序== |
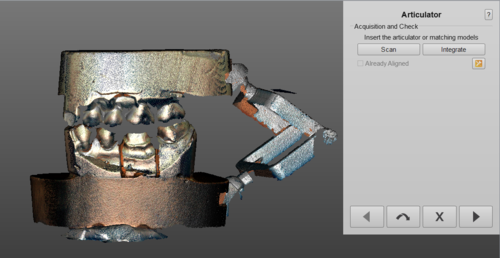
| − | + | 软件首先需要扫描的是咬合。不同于其它咬合架的策略,单侧模块低倾斜地取6个咬合图像。 | |
| − | + | 可以只需将模型放在面对摄像机的一面,确保它们足够稳定,并且在扫描过程中,它们不会移动。 | |
| − | + | {{Screenshot|Arti.PNG}} | |
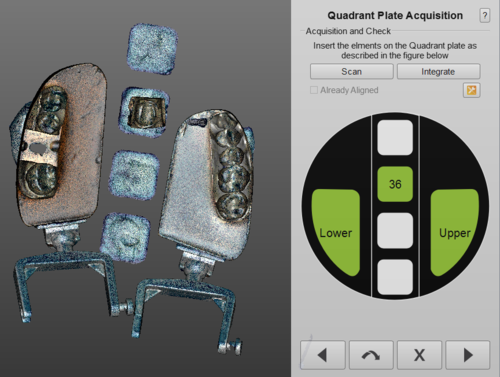
| − | + | 软件将呈现咬合图像的步骤;并随后需要扫描单侧咬模型架的各个组件,描述如何定位组件。 | |
| − | + | {{Screenshot|Quadr.PNG}} | |
| − | + | 执行该扫描后,组件已全部成功采集,并且用户不需要进一步扫描。 | |
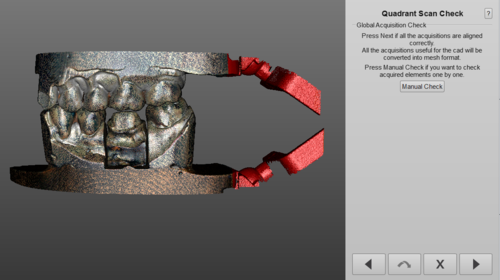
| − | + | 切除高度模式步骤之后,各个组件将对齐到咬合图像上。 | |
| − | + | {{Screenshot|Scancheck.PNG}} | |
| − | + | 此时该项目已准备好进行网格化,软件仍然提供了编辑图像的机会,或通过点击'''手动检查'''手动检查所有的单个组件。 | |
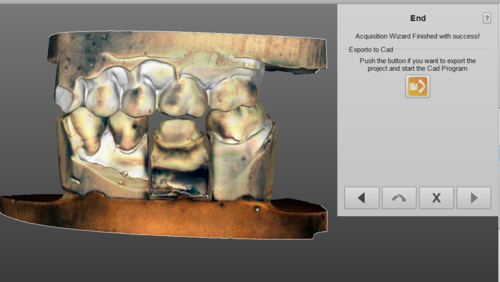
| − | + | 如果用户认为没有需要检查组件,只需点击''下一步'',扫描将进行网格生成,并准备导出。 | |
| − | + | {{Screenshot|ExportQ.PNG}} | |
| − | {{Navigation|Wiz_Export| | + | {{Navigation|Wiz_Export|Dop_Impronta}} |
Latest revision as of 12:19, 1 August 2017
单侧咬模模块
当在许可证中启用此模块时,可以在两个步骤内扫描单侧咬模项目。工作过程非常简单,完全自动化,全程有指导。
从OpticalRevEng Dental开始
要从扫描软件直接使用单侧咬模模块扫描项目,请访问项目管理器并创建这种类型的项目:
只需牢记,在模型类型的下拉选单选择“单侧咬模”并按下绿色的按钮接受。
从Exocad开始
可以从Exocad开始使用这种类型的扫描向导。只需要在Exocad的Dental DB中照常定义项目。
保存该项目,然后点击扫描按钮。这将启动扫描软件的引导程序。
在开始屏幕中选择“高级导入选项”,然后在模型类型下拉菜单选单侧模型。
点击开始按钮确认选择,软件将执行单侧咬模模块扫描向导。
扫描程序
软件首先需要扫描的是咬合。不同于其它咬合架的策略,单侧模块低倾斜地取6个咬合图像。
可以只需将模型放在面对摄像机的一面,确保它们足够稳定,并且在扫描过程中,它们不会移动。
软件将呈现咬合图像的步骤;并随后需要扫描单侧咬模型架的各个组件,描述如何定位组件。
执行该扫描后,组件已全部成功采集,并且用户不需要进一步扫描。
切除高度模式步骤之后,各个组件将对齐到咬合图像上。
此时该项目已准备好进行网格化,软件仍然提供了编辑图像的机会,或通过点击手动检查手动检查所有的单个组件。
如果用户认为没有需要检查组件,只需点击下一步,扫描将进行网格生成,并准备导出。
