Difference between revisions of "Wiz ManualCut/ja"
(Created page with "オブジェクトがプロジェクトの残りの部分にアライメントされた後、不必要な部分をカットして取り除くことができます。") |
(Created page with "このステップで使用するツールについては、データ編集ページで説明されています。唯一の違いは''アウトライアー...") |
||
| Line 5: | Line 5: | ||
オブジェクトがプロジェクトの残りの部分にアライメントされた後、不必要な部分をカットして取り除くことができます。 | オブジェクトがプロジェクトの残りの部分にアライメントされた後、不必要な部分をカットして取り除くことができます。 | ||
| − | + | このステップで使用するツールについては、[[Man_DataEditing|データ編集]]ページで説明されています。唯一の違いは''アウトライアー選択''機能の位置で、この場合は''高度な編集''パネルにあり、{{Inline button|Dental 2 5 wiz next.png}}アイコンをクリックすることでアクセスできます。 | |
{{Screenshot|dental_2_5_wizHealthyAutoCut.jpg}} | {{Screenshot|dental_2_5_wizHealthyAutoCut.jpg}} | ||
{{Navigation|Wiz_Align|Wiz_ProjectCheck}} | {{Navigation|Wiz_Align|Wiz_ProjectCheck}} | ||
Revision as of 13:11, 29 December 2015
ウィザードによる手動カット
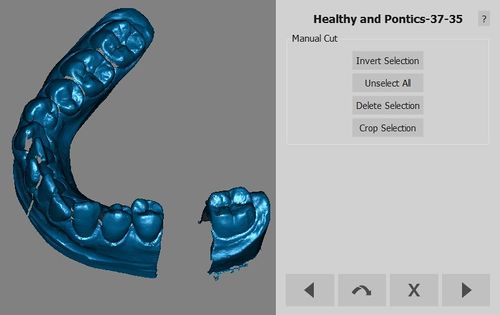
オブジェクトがプロジェクトの残りの部分にアライメントされた後、不必要な部分をカットして取り除くことができます。
このステップで使用するツールについては、データ編集ページで説明されています。唯一の違いはアウトライアー選択機能の位置で、この場合は高度な編集パネルにあり、![]() アイコンをクリックすることでアクセスできます。
アイコンをクリックすることでアクセスできます。


